Swagger2主要解决接口文档,有了它妈妈再也不用担心接口太多不方便管理了,只需要在写代码时候简单加入些注解即可,方便简单。
0.安装pom文件
直接在pom中用Maven下载jar包1
2
3
4
5
6
7
8
9
10<dependency>
<groupId>io.springfox</groupId>
<artifactId>springfox-swagger2</artifactId>
<version>2.2.2</version>
</dependency>
<dependency>
<groupId>io.springfox</groupId>
<artifactId>springfox-swagger-ui</artifactId>
<version>2.2.2</version>
</dependency>
1.创建Swagger2配置类
在Application.java同级创建Swagger2的配置类Swagger21
2
3
4
5
6
7
8
9
10
11
12
13
14
15
16
17
18
19
20
21
22
23
24
25
26
27
28
29
30
31
32
33
34
35
36
37
38
39
40
41
42
43
44
45
46
47
48
49
50
51
52
53
54
55
56
57
58package com.dataacquisition;
import org.springframework.context.annotation.Bean;
import org.springframework.context.annotation.Configuration;
import springfox.documentation.builders.ApiInfoBuilder;
import springfox.documentation.builders.PathSelectors;
import springfox.documentation.builders.RequestHandlerSelectors;
import springfox.documentation.service.ApiInfo;
import springfox.documentation.spi.DocumentationType;
import springfox.documentation.spring.web.plugins.Docket;
import springfox.documentation.swagger2.annotations.EnableSwagger2;
/**
* @author colin
* @version 1.0.0
* @date 17/10/24 下午12:02.
*/
2
public class Swagger2 {
public Docket createRestApi() {
ParameterBuilder parameterBuilder = new ParameterBuilder();
List<Parameter> parameters = new ArrayList<Parameter>();
parameterBuilder.name("Content-Type")
.description("header")
.modelRef(new ModelRef("string"))
.parameterType("header")
.required(false).build();
parameters.add(parameterBuilder.build());
parameterBuilder.name("Accept")
.description("header")
.modelRef(new ModelRef("string"))
.parameterType("header")
.required(false).build();
parameters.add(parameterBuilder.build());
//上面是设置header
return new Docket(DocumentationType.SWAGGER_2)
.apiInfo(apiInfo())
.select()// 选择那些路径和api会生成document
.apis(RequestHandlerSelectors.basePackage("com.iss.rest"))// 对所有api进行监控
// .apis(RequestHandlerSelectors.any())// 对所有路径进行监控
.paths(PathSelectors.any())
.build()
.globalOperationParameters(parameters)
.apiInfo(apiInfo());
}
private ApiInfo apiInfo() {
return new ApiInfoBuilder()
.title("经济运行大数据API")
.description("经济大数据")
.termsOfServiceUrl("www.baidu.com")
.contact("colin")
.version("1.0")
.build();
}
}
如上代码所示,通过@Configuration注解,让Spring来加载该类配置。
再通过@EnableSwagger2注解来启用Swagger2。
看一下这个目录结构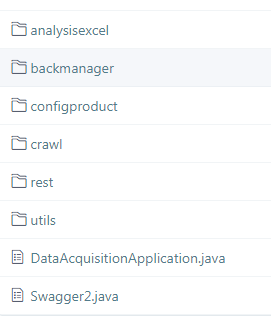
这里还要说明一下引包 PathSelectors
import springfox.documentation.builders.PathSelectors;
1.添加文档内容
在完成了上述配置后,其实已经可以生产文档内容,但是这样的文档主要针对请求本身,而描述主要来源于函数等命名产生,对用户并不友好,我们通常需要自己增加一些说明来丰富文档内容
GET接口 对于传统参数为?的1
2
3
4
5
6
7
8
9
10
11
12
13
14
15
16
17
18
19
20
21
22
23
24
25
26
27(value = "上传Excel", notes = "上传Excel并存入数据库", code = 200, produces = "application/json")
({(name = "userId",value = "用户ID",required = true,paramType = "query", dataType = "String"),
( name = "filepath", value = "上传文件路径地址用“/”",paramType = "query", required = true, dataType = "String"),
( name = "type", value = "上传文件类型", required = true,paramType = "query", dataType = "String"),
( name = "productId", value = "上传文件productId", required = true,paramType = "query", dataType = "String"),
( name = "version", value = "上传文件版本", required = false,paramType = "query", dataType = "String")
})
(value = "/uploadExcel", method = RequestMethod.GET)
public String uploadExcel(HttpServletRequest request) {
String filepath = WebUtils.findParameterValue(request, "filepath");
String productId = WebUtils.findParameterValue(request, "productId");
if(StringUtils.isBlank(filepath)||!new File(filepath).exists()){
return "请输入正确文件路径";
}
if(!configProductService.selectProductByProductId(productId)){
return "productId不存在,请输入正确的productId";
}
String userId = WebUtils.findParameterValue(request, "userId");
String type = WebUtils.findParameterValue(request, "type");
if(StringUtils.isBlank(type)){
return "请输入上传Excel的种类(type=)";
}
String version = WebUtils.findParameterValue(request, "version");
String result = uploadExcelService.uploadExcel(filepath,userId,type,version,productId);
String result2 = uploadExcelService.upload(filepath);
return result;
}
GET接口 对于参数为/的1
2
3
4
5
6
7
8
9
10
11
12
13
14
15
16
17
18
19
20
21
22
23
24
25
26
27
28
29
30
31
32
33(value = "获取所有新闻", notes = "获取所有新闻", code = 200, produces = "application/json")
({(name = "infoType",value = "行业动态等类别",required = true,paramType = "query", dataType = "String"),
( name = "type", value = "所属行业",paramType = "query", required = true, dataType = "String"),
})
(value = "/queryAllNewsNew/{infoType}/{type}/{startTime}/{endTime}/{region}/{pageNum}/{pageSize}",
method = RequestMethod.GET, produces = {"application/json"}, consumes = {"application/json"})
public Result queryAllNewsNew(@PathVariable("infoType") String infoType,
@PathVariable("type") String type,
@PathVariable("startTime") String startTime,
@PathVariable("endTime") String endTime,
@PathVariable("region") String region,
@PathVariable("pageNum") String pageNum,
@PathVariable("pageSize") String pageSize) {
if (StringUtils.isBlank(pageNum)) {
pageNum = "1";
}
if (StringUtils.isBlank(pageSize)) {
pageSize = "10";
}
ResultEducationInfo resultEducationInfo = new ResultEducationInfo();
resultEducationInfo.setRegion(region);
resultEducationInfo.setCityName(region);
resultEducationInfo.setInfoType(infoType);
resultEducationInfo.setCrawlType(type);
// resultEducationInfo.setTime(time);
resultEducationInfo.setStartTime(startTime);
resultEducationInfo.setEndTime(endTime);
resultEducationInfo.setPageNum(pageNum);
resultEducationInfo.setPageSize(pageSize);
Result result = jsonSearchService.queryAllNews(resultEducationInfo);
return result;
//Result.success(result);
}
POST接口1
2
3
4
5
6
7
8
9
10
11(value = "解析Excel", notes = "解析Excel", code = 200, produces = "application/json")
(name = "filepath", value = "上传文件路径地址用“/”",paramType = "query", required = true, dataType = "String")
(value = "/analysisExcel", method = RequestMethod.POST)
public Map analysisExcel(HttpServletRequest request) {
String filepath = WebUtils.findParameterValue(request, "filepath");
if(StringUtils.isBlank(filepath)||!new File(filepath).exists()){
return null;
}
Map result = uploadExcelService.analysisExcel(filepath);
return result;
}
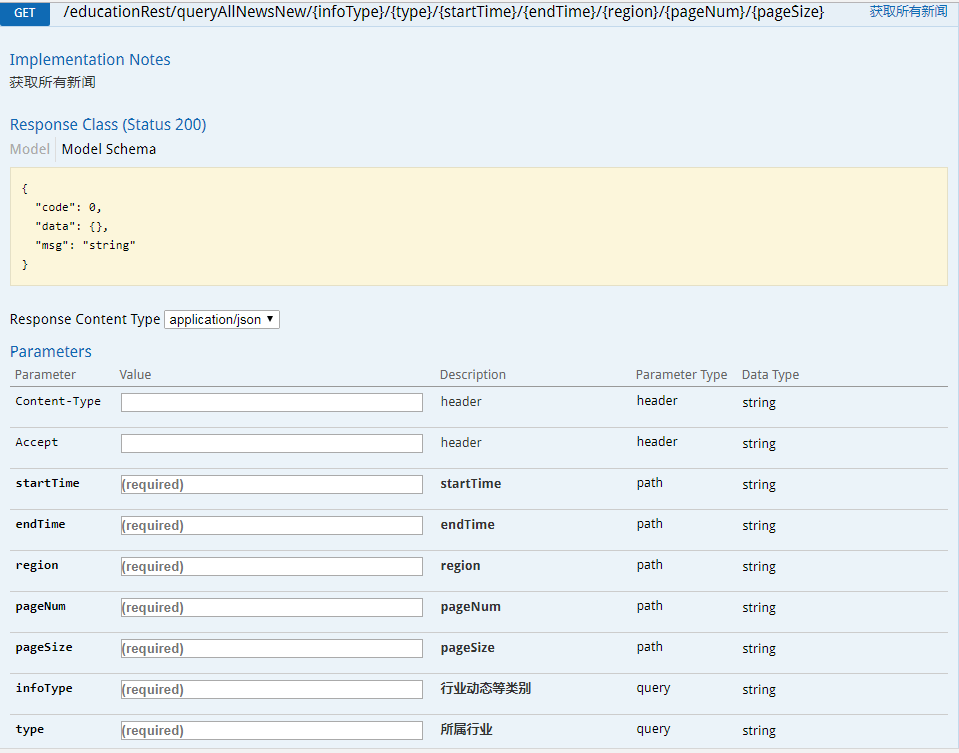
结果如图所示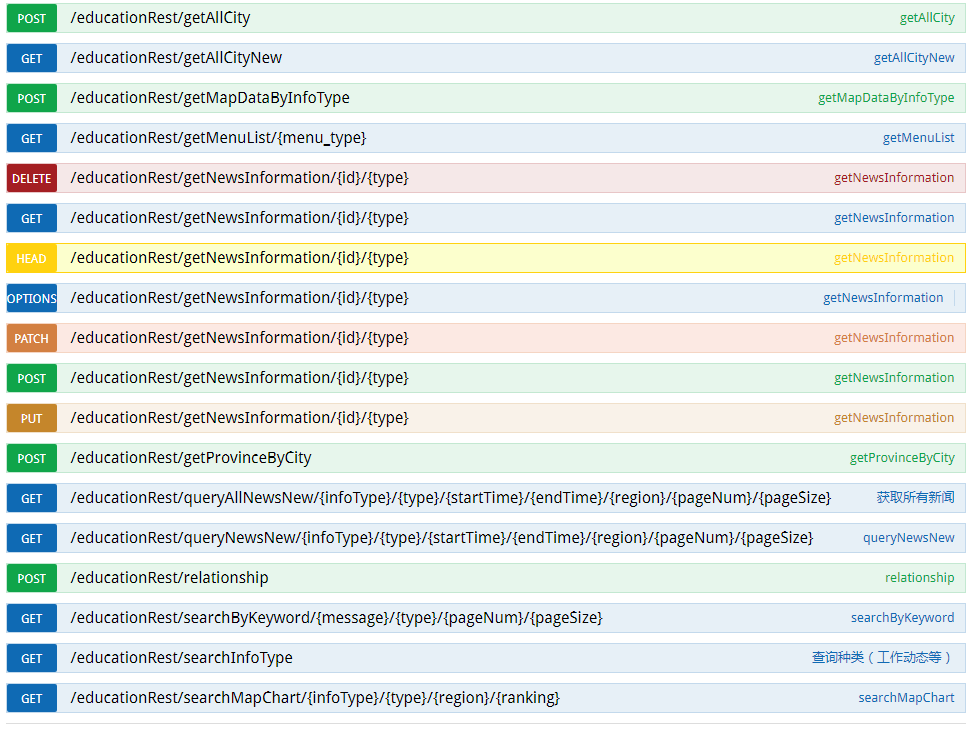
最后更新: 2018年11月10日 16:58