今天要做一个手机扫描登录,功能拆分,需要websocket推送信息到页面,不废话了直接开始吧。
0.导言
0.1什么是websocket
它的最大特点就是,服务器可以主动向客户端推送信息,客户端也可以主动向服务器发送信息,是真正的双向平等对话,属于服务器推送技术的一种。
0.2准备
都需要什么准备呢?毫无疑问需要客户端(浏览器),服务端(后台),这里后台我们用的是Springboot。
1.后台Springboot
1.1引包
在pom中引用webpack包1
2
3
4
5
6<!-- 操作websoket-->
<dependency>
<groupId>org.springframework.boot</groupId>
<artifactId>spring-boot-starter-websocket</artifactId>
<version>1.3.5.RELEASE</version>
</dependency>
1.2注入ServerEndpointExporter
使用springboot内置tomcat进行部署的话,在编写websocket具体实现类之前,要注入ServerEndpointExporter,这个bean会自动注册使用了@ServerEndpoint注解声明的Websocket endpoint。1
2
3
4
5
6
7
8
9
10
11
12
13
14import org.springframework.context.annotation.Bean;
import org.springframework.context.annotation.Configuration;
import org.springframework.web.socket.server.standard.ServerEndpointExporter;
/**
* Created by linjiad on 2018/5/18.
*/
public class WebSocketConfig {
public ServerEndpointExporter serverEndpointExporter(){
return new ServerEndpointExporter();
}
}
1.3写自己的实现类
直接先看代码吧1
2
3
4
5
6
7
8
9
10
11
12
13
14
15
16
17
18
19
20
21
22
23
24
25
26
27
28
29
30
31
32
33
34
35
36
37
38
39
40
41
42
43
44
45
46
47
48
49
50
51
52
53
54
55
56
57
58
59
60
61
62
63
64
65
66
67
68
69
70
71
72
73
74
75
76
77
78
79
80
81
82
83
84
85
86
87
88
89
90
91
92
93
94
95import net.sf.ehcache.util.concurrent.ConcurrentHashMap;
import org.springframework.stereotype.Component;
import javax.websocket.*;
import javax.websocket.server.ServerEndpoint;
import java.io.IOException;
import java.util.Map;
/**
* Created by linjiad on 2018/5/18.
*/
(value = "/websocket")
public class MyWebSocket {
//统计在线人数
private static int onlineCount = 0;
//用本地线程保存session
private static ThreadLocal<Session> sessions = new ThreadLocal<Session>();
//保存所有连接上的session
private static Map<String, Session> sessionMap = new ConcurrentHashMap<String, Session>();
public static synchronized int getOnlineCount() {
return onlineCount;
}
public static synchronized void addOnlineCount() {
onlineCount++;
}
public static synchronized void subOnlineCount() {
onlineCount--;
}
//连接
public void onOpen(Session session) {
sessions.set(session);
addOnlineCount();
sessionMap.put(session.getId(), session);
System.out.println("【" + session.getId() + "】连接上服务器======当前在线人数【" + getOnlineCount() + "】");
//连接上后给客户端一个消息
sendMsg(session, "恭喜你连接服务器成功!"+session.getId());
}
//关闭
public void onClose(Session session) {
subOnlineCount();
sessionMap.remove(session.getId());
System.out.println("【" + session.getId() + "】退出了连接======当前在线人数【" + getOnlineCount() + "】");
}
//接收消息 客户端发送过来的消息
public void onMessage(String message, Session session) {
System.out.println("【" + session.getId() + "】客户端的发送消息======内容【" + message + "】");
String[] split = message.split(",");
String sessionId = split[0];
Session ss = sessionMap.get(sessionId);
if (ss != null) {
String msgTo = "【" + session.getId() + "】发送给【您】的消息:\n【" + split[1] + "】";
String msgMe = "【我】发送消息给【"+ss.getId()+"】:\n"+split[1];
sendMsg(ss, msgTo);
sendMsg(session,msgMe);
}else {
for (Session s : sessionMap.values()) {
if (!s.getId().equals(session.getId())) {
sendMsg(s, "【" + session.getId() + "】发送给【您】的广播消息:\n【" + message + "】");
} else {
sendMsg(session,"【我】发送广播消息给大家\n"+message);
}
}
}
}
//异常
public void onError(Session session, Throwable throwable) {
System.out.println("发生异常!");
throwable.printStackTrace();
}
//统一的发送消息方法
public synchronized void sendMsg(Session session, String msg) {
try {
session.getBasicRemote().sendText(msg);
} catch (IOException e) {
e.printStackTrace();
}
}
}
这段代码里面注释都很清晰了,不多说了,重点是在 onMessage 方法中。
后端就这么多久搞定了,很简单,把后端项目跑起来等待前端信息就可以了
2.前端
2.1 页面HTML
HTML就很简单了,一个div,一个输入框,一个按钮就搞定1
2
3
4
5
6
7
8
9
10
11
12
13
14
<html lang="en">
<head>
<meta charset="UTF-8">
<meta name="viewport" content="width=device-width, initial-scale=1.0">
<meta http-equiv="X-UA-Compatible" content="ie=edge">
<title>jspang webpack</title>
</head>
<body>
<div id = "message"></div>
<input type="text" id="ceshi">
<button id="a">发送</button>
</body>
</html>
别问我为啥没引用js,因为我用的是webpack这个之后再讲。
2.2 js实现
这个地方我分成了两部分,用import形式引入websocket部分
先看index.js1
2
3
4
5
6import websocket_config from './js/websocket_config.js';
let websocket = new websocket_config.Websocket();
$("#a").on('click', function() {
let message = document.getElementById('ceshi').value;
websocket.send(message);
})
这段代码就是点击按钮把’ceshi’信息传给后台
另一个websocket_config,我是把websocket部分封装进来1
2
3
4
5
6
7
8
9
10
11
12
13
14
15
16
17
18
19
20
21
22
23
24
25
26
27
28
29
30
31
32
33
34
35
36
37
38
39
40
41
42
43
44
45
46class Websocket{
constructor(url="ws://localhost:11000/websocket") {
let self = this;
self.url=url;
let websocket = null;
//判断当前浏览器是否支持WebSocket
if('WebSocket' in window){
self.websocket = new WebSocket(this.url);
}
else{
alert("您当前浏览器不支持websocket")
}
//连接发生错误的回调方法
self.websocket.onerror = function(){
self.setMessageInnerHTML("error");
};
//连接成功建立的回调方法
self.websocket.onopen = function(event){
self.setMessageInnerHTML("open");
}
//接收到消息的回调方法
self.websocket.onmessage = function(event){
console.log(event);
self.setMessageInnerHTML(event.data);
}
//连接关闭的回调方法
self.websocket.onclose = function(){
self.setMessageInnerHTML("close");
}
//监听窗口关闭事件,当窗口关闭时,主动去关闭websocket连接,防止连接还没断开就关闭窗口,server端会抛异常。
window.onbeforeunload = function(){
self.websocket.close();
}
}
setMessageInnerHTML(innerHTML) {
document.getElementById('message').innerHTML += innerHTML + '<br/>';
}
closeWebSocket(){
this.websocket.close();
}
//发送消息
send(message){
this.websocket.send(message);
}
}
export default {Websocket};
敲黑板划重点,这里有个坑,就是Class里面的this,前面我们这么写的
let self = this;
否则后面function里面this指向自己的function
3 看看具体效果吧
直接输入信息会广播出去给所有人,如图所示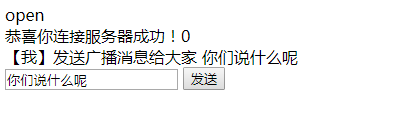
所有人都会看到信息
因为在后台代码1
2
3
4
5
6
7
8
9
10
11
12
13
14
15
16
17
18
19
20
21
22
23
24
25
26
27
28
29
30
31//接收消息 客户端发送过来的消息
public void onMessage(String message, Session session) {
System.out.println("【" + session.getId() + "】客户端的发送消息======内容【" + message + "】");
String[] split = message.split(",");
String sessionId = split[0];
Session ss = sessionMap.get(sessionId);
if (ss != null) {
String msgTo = "【" + session.getId() + "】发送给【您】的消息:\n【" + split[1] + "】";
String msgMe = "【我】发送消息给【"+ss.getId()+"】:\n"+split[1];
sendMsg(ss, msgTo);
sendMsg(session,msgMe);
}else {
for (Session s : sessionMap.values()) {
if (!s.getId().equals(session.getId())) {
sendMsg(s, "【" + session.getId() + "】发送给【您】的广播消息:\n【" + message + "】");
} else {
sendMsg(session,"【我】发送广播消息给大家\n"+message);
}
}
}
}
//统一的发送消息方法
public synchronized void sendMsg(Session session, String msg) {
try {
session.getBasicRemote().sendText(msg);
} catch (IOException e) {
e.printStackTrace();
}
}
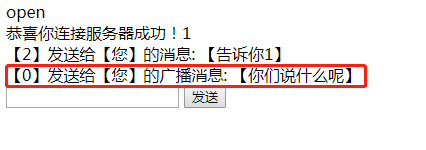
如果,前面没有id则会循环sessionMap发给所有人
如果,前面有id则单独发给一个人 session.getBasicRemote().sendText(msg);谁获取了什么消息
最后更新: 2018年11月10日 16:58